Six steps to delivering a PV system
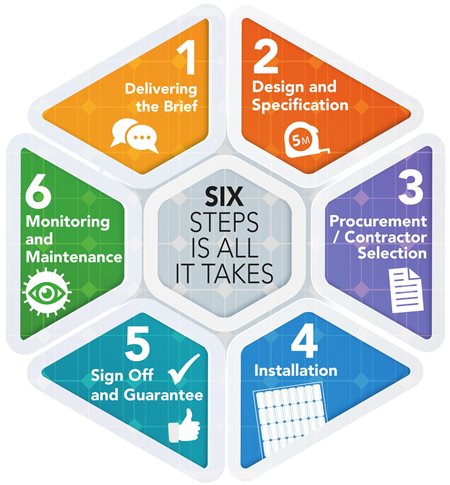
Successfully designing and delivering a PV system can be a complicated process if all parties involved are not collaborating and communicating effectively from the earliest possible stage. Below are the six steps we have identified as being crucial in delivering a rooftop PV system and the key design considerations that must be acknowledged at each stage.
Jump To: Turnkey service diagram ►
STEP 1: Delivering the Brief
Be clear about the key factors to be achieved when meeting with your preferred selection of manufacturer/suppliers to cover:
• Why PV is to be included in the building design.
• What the scheme is to achieve, including the size/output required from the array.
• Site locations that need to be taken into consideration such as shading by overhanging trees or nearby buildings and rooftop plant and equipment etc.
STEP 2: Design and Specification
Ensure all the parties from within the project delivery team understand the brief and work together so that a cohesive process is presented by everyone including principle contractor and M&E or sustainability consultant. A roof layout should be produced as early as possible as this will enable all parties to identify any conflicts with other plant equipment or access points and walkways.Take into account how the different specification elements can get fragmented and consider a solution where all elements can be designed and sourced from a single company. This prevents miscommunication and delivers a single point of
contact for all queries. Confirm that the proposed waterproofing and attachment method of PV mounting system are fully compatible and that the integrity of the roof finish is uncompromised. Durability of the roofing system should match the life span of the PV array.
As a minimum specification should outline:
• Output of system
• Module specification
• Mounting solution
• Inverter specification
• Monitoring requirement
• Maintenance requirement
Ensure design liability and wind load calculations are accounted for and included within the guarantee cover proposed. When connecting a solar power system to the grid, the application process involves the submission of a form to the relevant Distribution Network Operator (DNO) prior to installation.
Different sized systems require different applications with the correct process dependent on the output thresholds:
• G83 Application – can be submitted post installation if the system is deemed to be fewer than 16A per phase (3.68kW).
• G59 Application – needs to be submitted prior to installation for systems deemed to be over 16A per phase and is a legal requirement before installation can commence. An important factor to take into consideration is the time duration for the DNO to confirm and accept that the works can commence on site, which has to be received prior to installation.
STEP 3: Procurement / Contractor Selection
The standard procurement process will apply to the installation of the PV system. Ensuring that the installing contractor understands the site needs and are familiar with both the solar and roofing requirements is paramount.
They should be fully aware of any installation constraints such as quiet hours, caveats on deliveries or site access.
STEP 4: Installation
In both new build and refurbishment applications existing buildings can provide a number of restraints, consider the following:
Retrofit applications
• Is the structure suitable for ballasted applications?
• Are you able to ‘load out’ the roof temporarily?
• What protection is required for the waterproofing whilst the materials are transported around the roof?
• Inverter locations – where is best to site the inverters? If possible site them in a cool shaded area in a roof level plant room or on the roof.
New build applications
• Solar modules can be damaged by other trades – best practice is to leave these until all other roof trades have finished.
• Often, the roof elements will be installed in advance of the internal installation and commissioning – has this been allowed for?
• Have other trades especially the roofing contractor, been made aware of the array and its impact on their systems? i.e are any penetrations required for cabling or hand rail mansafe systems etc.
• Modules are large, high value items and should be lifted to the roof palletised rather than by hand.
STEP 5: Sign Off and Guarantee
Guarantees can take many forms including coverage for performance, product manufacture and system warranty for the proper operation of equipment for a specific period of time; less frequently though are yield warranties guaranteeing a minimum energy output of the PV panels over time. It is worth bearing in mind that other components for the system, including inverters and the waterproofing system, may have different life expectancies than the PV panels. Clearly the best route is to ensure that the replacement of any elements should be easy to reinstate and not entail significant disruption to the roof, building or running of the system.
STEP 6: Monitoring and Maintenance
In commercial applications, providing the opportunity for staff, clients and building managers to see how much power is being produced by the PV system can encourage energy saving practices and enables the building operator to confirm the real energy output as well as compare it to the array design estimate. Sophisticated monitoring systems are easily incorporated into the specification and should be set up by the installing contractor. The client or building operator should be trained on how to maximise the system and how to identify outputs that could be increased through safe maintenance. Where possible the client should undertake a maintenance contract with a specialist.

back to top ►